
Supply and Demand in Futures Markets
Learn how buyer and seller forces drive price action and create trading opportunities in futures markets.
Supply and demand constantly interact to drive futures prices up or down. Understanding these forces can help you anticipate market turning points and identify high-probability trading opportunities. Unlike complex indicators that lag price action, supply and demand analysis focuses on the raw forces that actually move markets—the battle between buyers and sellers at specific price levels.
The beauty of supply and demand trading lies in its simplicity: when buying pressure overwhelms selling pressure, prices rise. When selling pressure dominates, prices fall. But more importantly, these imbalances leave footprints on charts that savvy traders can use to predict future price behavior.
What Are Supply and Demand Forces in Futures?
Key Definition: Supply and demand in futures markets represent the ongoing battle between buyers (demand) and sellers (supply) at specific price levels. When these forces become severely imbalanced, they create explosive price movements that establish important zones where similar reactions may occur in the future.
Supply represents selling pressure—areas where traders are willing to offer contracts for sale. Demand represents buying pressure—levels where traders aggressively purchase contracts. The interaction between these forces determines both current prices and creates reference points for future price action.
In futures markets, supply and demand dynamics are amplified by leverage and the participation of both commercial hedgers and speculators. A relatively small number of large orders can quickly shift the balance, creating the sharp moves that define strong supply and demand zones.
Important: These forces operate on all timeframes, from tick charts to monthly charts, but the most significant zones often form during high-volume, emotional market periods.
How Do Supply and Demand Forces Work?
Supply and demand forces operate through order flow and the absorption of buying or selling interest at specific price levels. When price reaches a level where significant orders are waiting, explosive moves occur as that liquidity gets consumed.
Market Dynamics in Action
Real Example: Crude Oil Futures
- Normal trading price: $75.00
- Breaking news hits: pipeline disruption
- Buyers flood the market, rushing to secure supply
- Price spikes to $77.50 in minutes
- Sellers step in, offering contracts at higher prices
- Market settles at new equilibrium around $76.50
This sequence demonstrates how market drivers can instantly shift supply and demand balance. The sharp move from $75.00 to $77.50 consumed available selling interest, while the pullback to $76.50 shows new sellers entering at elevated prices.
Key insight: News events can cause supply shocks or demand surges, leading to rapid price moves before the market stabilizes. These moves often establish important zones for future trading.
The Psychology Behind Zone Formation
Large institutional traders can't execute massive positions instantly without moving prices against themselves. Instead, they accumulate or distribute positions over time, creating the base formations that precede explosive moves.
When you see a sharp rally from a consolidation area, it often represents institutional buying absorbing all available selling pressure. That base area becomes a demand zone because unfilled buyers likely remain at those levels, waiting for price to return.
Risk Warning: Not all sharp moves create lasting zones. Volume, market context, and the strength of the initial move determine zone reliability.
What Makes Futures Supply and Demand Unique?
Leverage Amplification
Futures leverage magnifies supply and demand imbalances. A relatively modest order flow imbalance can create dramatic price moves that wouldn't occur in less leveraged markets.
Example Impact:
- Stock market: $1 million buy order might move price 0.1%
- E-mini S&P 500: Same $1 million order (20+ contracts) could move price 0.5-1.0%
- The amplified move creates stronger, more visible zones
Commercial vs Speculative Flow
Futures markets blend commercial hedging with speculative trading. Commercial participants (airlines hedging fuel, farmers selling crops) often create the most reliable supply and demand zones because their trading is based on fundamental business needs rather than technical levels.
Contract Expiration Effects
As contracts approach expiration, supply and demand dynamics shift. Commercial players may need to roll positions or take delivery, creating predictable flow patterns that savvy traders can exploit.
Who Uses Supply and Demand Analysis?
Professional Day Traders
Active traders use supply and demand zones for precise entry and exit timing. These levels often provide the best risk-reward ratios because stops can be placed just beyond zones with targets at the next opposing zone.
Trading Application:
- Enter long positions at established demand zones
- Place stops just below the zone
- Target previous supply zones for exits
Institutional Traders
Large traders must understand supply and demand because their own order flow contributes to zone formation. They often "lean on" these zones when building positions, adding buying at demand zones or selling at supply zones.
Swing Traders
Swing traders use supply and demand zones to identify major turning points for multi-day position trades. The best swing trade setups often occur when price returns to test significant zones after extended moves.
Algorithmic Systems
Modern algorithms specifically hunt for supply and demand imbalances, often triggering rapid moves when zones are tested. Understanding this can help manual traders position themselves ahead of algorithmic flow.
What Do Market Participants Need to Know?
Identifying High-Quality Zones
Strong Demand Zone Characteristics:
- Sharp rally from consolidation base
- High volume during the initial move
- Clean, quick departure from the zone
- Limited retesting (fresh zones are stronger)
Strong Supply Zone Characteristics:
- Sharp decline from distribution area
- Heavy volume on the initial drop
- Price couldn't recover quickly
- Clear rejection of higher prices
Zone Validation Techniques
Use Level 2 market data to observe real-time supply and demand. When price approaches a historical zone, watch for:
- Increased bid/offer size
- Aggressive buying or selling
- Slippage on market orders
- Order book thickness
Platform Setup for Zone Trading
Whether using Optimus Flow Desktop, Optimus Web, or mobile apps, configure your platform to highlight volume and draw zone boundaries clearly. Historical volume information helps validate zone strength.
Key Concepts for Supply and Demand Trading
Zone Memory and Market Psychology
Real Example: Gold Futures
- Price rallies sharply to $2,050
- Strong selling pressure appears
- Price drops quickly to $2,030
- $2,050 now acts as key resistance level—future approaches watched closely
- Similar patterns on downside create support zones
Critical insight: Heavy selling or buying at specific prices often creates zones where markets react again later. Traders remember these levels and position accordingly.
The Role of Volume
Volume analysis confirms zone strength. High volume during zone formation suggests significant institutional participation, making future reactions more likely.
Volume Signals:
- High volume + sharp move = strong zone formation
- Low volume + gradual move = weak zone (often fails)
- Volume spikes at zone tests = confirming reactions
Multi-Timeframe Confluence
The strongest trading opportunities occur when supply and demand zones align across multiple timeframes. A daily demand zone that also contains an hourly demand zone creates higher probability setups.
Zone Refreshment
Zones can "refresh" or strengthen when price returns and shows strong reactions. Each successful defense of a zone adds to its credibility, while penetration weakens it.
Important Patterns:
- Price moves reflect real-time buyer/seller imbalances
- Sharp moves often create future reference points (support/resistance)
- Heavy trading volume typically marks important supply/demand zones
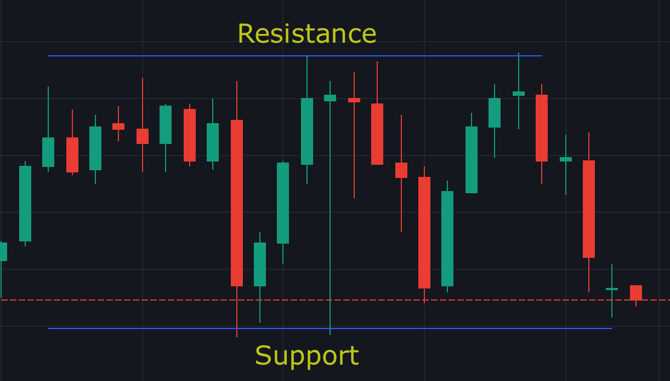
- Previous resistance can become new support—and vice versa
- Markets have memory—traders remember major levels where sharp moves occurred
Frequently Asked Questions
How do I distinguish between strong and weak supply and demand zones?
Strong zones show sharp, decisive moves away from the level with high volume and limited consolidation. Weak zones develop gradually with choppy price action and low volume. Focus on zones where price "exploded" away from the level rather than zones where price slowly drifted.
Can supply and demand zones work in all market conditions?
Supply and demand analysis works best in trending and volatile markets where clear imbalances develop. During low-volatility, range-bound conditions, zones may be less reliable as institutional flow is minimal and retail sentiment dominates.
How long do supply and demand zones remain valid?
Zone validity depends on market structure and time. Fresh zones (recently formed) are typically strongest. Zones lose power as they're tested repeatedly or as market conditions change fundamentally. Major zones can remain relevant for weeks or months in liquid markets.
Should I use stop losses when trading supply and demand zones?
Absolutely. Place stops just beyond zone boundaries to limit risk if zones fail. Stop-loss strategies are essential because even strong zones can be overwhelmed by unexpected order flow or fundamental changes.
How do I identify supply and demand zones in real-time?
Watch for sudden changes in order flow, unusual volume spikes, and aggressive buying or selling. Real-time zone formation shows up as sharp moves with immediate follow-through rather than gradual price changes.
Do micro futures respond to supply and demand zones the same way?
Yes, micro futures follow the same supply and demand principles as standard contracts since they track the same underlying markets. The zones form at identical price levels, though the dollar impact per contract is smaller.
How do I avoid false signals from weak zones?
Focus on zones with clear institutional characteristics: sharp moves, high volume, clean departures, and limited retesting. Avoid zones formed during low-volume periods or gradual moves that lack the explosive nature of true supply/demand imbalances.
Next Steps in Your Futures Education
Master the Fundamentals:
- ✅ Supply and demand overview (covered in this article)
- Order flow → Understanding Order Flow in Futures
- Market data → Level 2 Market Depth Explained
Apply Your Knowledge:
- Chart analysis → Market Positioning and Technical Analysis
- Volume analysis → Order Book Analysis Techniques
- Risk management → Position Management Techniques
Develop Trading Skills:
- Day Trading Fundamentals for zone-based entries
- Swing Trading Fundamentals for multi-timeframe analysis
- Volatility Trading Strategies for zone breakout trading
Risk Disclaimer
The content of this guide is the opinion of Optimus Futures.
Futures and options trading involves substantial risk and is not suitable for all investors. Past performance is not necessarily indicative of future results. Examples provided are for illustrative and educational purposes only and should not be construed as specific trading advice or recommendations.
Trading on margin and with leverage carries a high level of risk, as it can amplify both gains and losses.
The placement of contingent orders such as "stop-loss" or "stop-limit" orders will not necessarily limit your losses to the intended amounts, since market conditions may make it impossible to execute such orders. Risk management techniques discussed (such as stops, stop-limits, or bracket orders) cannot eliminate risk.
You should only trade with risk capital—that is, money you can afford to lose without affecting your lifestyle or financial security. There are no “proven” methods or guaranteed systems for making money in futures trading. It is a challenging process that requires ongoing learning, discipline, and adapting to changing market conditions. Traders must carefully consider their financial condition, risk tolerance, and trading objectives before engaging in futures or leveraged markets. It is important to note that most traders do lose money trading futures.